4th of July Printables

Wednesday

The 4th of July is one of my favorite holidays. I love to look for an excuse to be extra patriotic and support the men and women who have served and who are still serving our country (Thanks Michael, love you).

I love to decorate for every holiday, no matter if everybody else does or not. Our house is covered with some fun 4th of July decorations, and here are a few of my favorite printables to throw up for Independence Day!


I've been pinning away some of my favorite ideas for patriotic décor, follow my holiday's board on pinterest here. Here are a few of my favorite things ...


Newborn Photoshoot!

Friday

Before Mikey was even born, I had a plan for newborn pictures. Thanks to pinterest, I knew exactly what I wanted ... all I needed was a photographer, and so the search began. After stalking facebook pages, we called Stephanie Gambrell from Stephanie Gambrell Photography and I could not be happier with the final product! She was wonderful, extremely professional, and incredibly easy to work with. All photos are Stephanie Gambrell Photography.


Hospital Packing List!

We have started packing for the hospital, and I had no idea how stressful that was! After looking online for suggestions on what to bring, I was shocked when I found about a million different answers and none of them seemed to match the previous. I took it upon myself to create my own list of things that we THINK we are going to need ...

As a first-time mom & dad, I am sure our list isn't perfect. But this is what we came up with.

We think we have covered all of our bases. I'm sure after the experience, we will have a better idea of what to add, what to subtract and what we completely forgot about!

Our Family Binder

Wednesday

Being organized is the purpose of my entire life. Okay, maybe not, but I spend a lot (understatement!) of my time looking for ways to get organized and stay that way. With our busy schedules, Michael and I have to be on the same page and sometimes, we aren't able to communicate during the day so organization is key to maintaining a "got-it-going-on" routine in our house.

So, while I have this full supply of "nesting crack" running through my veins, I've decided to take the opportunity to organize our family binder. We never actually had a family binder because it wasn't so difficult to keep track of just the two of us, but with Mikey making his grand appearance, I have a feeling that it's about to get a lot more difficult to keep track of where my car keys are, not to mention all the meal planning, Army schedules, important phone numbers and addresses in order. This was the birth of our Family Binder.

Without further ado, I am proud to introduce to you the Rotundo Family Binder! I'm sure this will grow as our family grows, but for now, it has 5 sections. (1) Emergency Contacts and Information (2) Mikey, (3) Meal Planning, (4) Important Dates and (5) Daily Routines and Schedules. The purpose for this? Not only organizing everything into one central location, but for quick access if (god forbid!) there was ever an emergency and a caregiver needed the information, if Michael needed important information to the hospital and I was MIA, and every possible scenario in between. Let's not talk about what could possibly happen!

The Binder Breakdown -


I wanted to first section to house things that we may need quick access to. A pen/pencil, tape, scissors, tape, stamps, etc. These things may be needed for other sections and are easy to access!

SECTION 1 - EMERGENCY CONTACTS

I wanted this section to include everything that may be important in case of emergency. Here is a template of the printable I used to house this information.
 
SECTION 2 - MIKEY
Although he hasn't said HELLO WORLD! yet, in this section we store all of our important documents for when that time comes, as well as some helpful resources in our first few days of parenting. You best believe this binder WILL be an essential in our hospital bag!

 
SECTION 3 - MEAL PLANNING
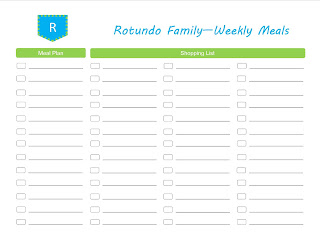
It's no secret that I "suffer" from OCD, so this means that I NEED to know what we will be eating each day of the month and what our grocery list is going to look like. Most of the time this is well planned out before the month has even begun. So in this section I house my meal plans, coupons, sales ad's and anything else that may save us a penny here or there!
 
 
SECTION 4 - IMPORTANT DATES
Every family has a list of important dates, and 9 times out of 10 somebody happens to forget one of these dates, so behold, the important dates section! Here I list out all birthdays, anniversaries, commitments and appointments we have. If a family member needs to know what's coming up, just check out the binder!
 

NOTE: This does not replace the family calendar which is proudly displayed on our refrigerator.
 
SECTION 5 - DAILY ROUTINES AND SCHEDULES

We all have a routine, schedule, whatever you want to call it. In this section, I have listed out our daily routines for myself, for Michael and soon-to-come: Mikey's schedule. This way, if Michael and I find ourselves baby-less for a night and a babysitter has taken over, a schedule for Mikey is right there for him/her to follow. These schedules and routines are helpful to know where each family member is in case of an emergency, the best contact information to use, and helpful to anybody who may be offering care to pets, babies, or our home in the rare case that we may be gone for an extended period of time.

DIY Wall Decor!

Michael and I have lived in Germany for 6 months now and we have been staring at blank, boring walls the entire time. It's time for that to change! We've quickly realized that with baby Mikey on the way, now it probably our only change to get our home in order before he arrives. I could not be more on board with this idea, as my inner OCD freak is crying out at the sight of our home! Our first project, DIY Wall Décor.

I've seen wonderful wall decals millions of times that I love, and I've even purchased a few, but living in Germany makes it not only difficult to receive that stuff, it makes waiting on your "stuff" to arrive absolutely miserable, so I decided to create some of my own wall décor.

We recently decided we want to install a breakfast bar instead of putting an actual dining table in the space we have for a "dining room". With the way military housing is set up, it's really just one big square room that they expect you to fit a living room, dining room AND office inside. NOT HAPPENING! So we looked for as many ways to save space as possible, and born was the idea of the breakfast bar. (Full credit to Michael, he was the brains behind THAT operation!)

Since the bar will be up against a wall with no window/view whatsoever, we had to put something there! We haven't decided if we want the bar to face inward toward the wall, or outward toward the living room. It's still a work in progress .... which is why there are no pictures of the bar. Coming soon!

Either way we decide to mount this bar, we need something on this wall. Que the tutorial -

DIY WALL DECOR!
 
First I decided what I wanted to put on the wall. This was probably the simplest step, but it took the most time. There are so many options! Once you decide, I found the images and fonts that I wanted to use on my computer, found average old computer paper and traced my letters STRAIGHT from the computer screen. Easy peesy lemon squeezy!
 
 
Next, I cut out the letters I had chosen. Don't freak if the lines aren't perfect. You will be able to fix this later.
 
 
After cutting out the letters I found the perfect placement for them on the wall. They moved around about 1,873 times before I got it "just right!" Tape those babies up there and make sure you LOVE it before you start painting.


After I taped my templates on the wall, I started taping, again. I taped the outline of each letter and then removed it from the wall. If your lines aren't perfectly straight from cutting out the letters, this is the step that can fix that. Be certain that your painters tape is straight.


I had chosen a 2 level design, so I taped a box beneath my letters as a template for my second level. Because I have done this a few times, I was comfortable enough freehanding this part. I chose a cursive font which would have been impossible to tape, so I just hand-wrote the words on the wall. If you are not comfortable with your ability or do not like your handwriting, find a font you like and practice. And then practice some more, and keep practicing until you are comfortable enough with it. I practiced quite a few times before slapping it up on the wall, here are a few of my trials.
 
 
After everything is taped off, start painting! My favorite part!
 
Let dry. Have patience my friends, it takes time for the paint to try completely and removing the tape prematurely can ruin your design.
 
Do any touching up that may be necessary and viola! Your new wall décor.