Our Family Binder

Wednesday

Being organized is the purpose of my entire life. Okay, maybe not, but I spend a lot (understatement!) of my time looking for ways to get organized and stay that way. With our busy schedules, Michael and I have to be on the same page and sometimes, we aren't able to communicate during the day so organization is key to maintaining a "got-it-going-on" routine in our house.

So, while I have this full supply of "nesting crack" running through my veins, I've decided to take the opportunity to organize our family binder. We never actually had a family binder because it wasn't so difficult to keep track of just the two of us, but with Mikey making his grand appearance, I have a feeling that it's about to get a lot more difficult to keep track of where my car keys are, not to mention all the meal planning, Army schedules, important phone numbers and addresses in order. This was the birth of our Family Binder.

Without further ado, I am proud to introduce to you the Rotundo Family Binder! I'm sure this will grow as our family grows, but for now, it has 5 sections. (1) Emergency Contacts and Information (2) Mikey, (3) Meal Planning, (4) Important Dates and (5) Daily Routines and Schedules. The purpose for this? Not only organizing everything into one central location, but for quick access if (god forbid!) there was ever an emergency and a caregiver needed the information, if Michael needed important information to the hospital and I was MIA, and every possible scenario in between. Let's not talk about what could possibly happen!

The Binder Breakdown -


I wanted to first section to house things that we may need quick access to. A pen/pencil, tape, scissors, tape, stamps, etc. These things may be needed for other sections and are easy to access!

SECTION 1 - EMERGENCY CONTACTS

I wanted this section to include everything that may be important in case of emergency. Here is a template of the printable I used to house this information.
 
SECTION 2 - MIKEY
Although he hasn't said HELLO WORLD! yet, in this section we store all of our important documents for when that time comes, as well as some helpful resources in our first few days of parenting. You best believe this binder WILL be an essential in our hospital bag!

 
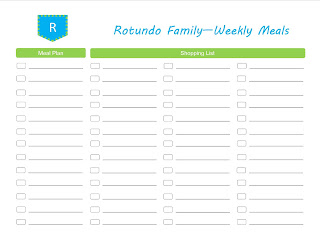
SECTION 3 - MEAL PLANNING
It's no secret that I "suffer" from OCD, so this means that I NEED to know what we will be eating each day of the month and what our grocery list is going to look like. Most of the time this is well planned out before the month has even begun. So in this section I house my meal plans, coupons, sales ad's and anything else that may save us a penny here or there!
 
 
SECTION 4 - IMPORTANT DATES
Every family has a list of important dates, and 9 times out of 10 somebody happens to forget one of these dates, so behold, the important dates section! Here I list out all birthdays, anniversaries, commitments and appointments we have. If a family member needs to know what's coming up, just check out the binder!
 

NOTE: This does not replace the family calendar which is proudly displayed on our refrigerator.
 
SECTION 5 - DAILY ROUTINES AND SCHEDULES

We all have a routine, schedule, whatever you want to call it. In this section, I have listed out our daily routines for myself, for Michael and soon-to-come: Mikey's schedule. This way, if Michael and I find ourselves baby-less for a night and a babysitter has taken over, a schedule for Mikey is right there for him/her to follow. These schedules and routines are helpful to know where each family member is in case of an emergency, the best contact information to use, and helpful to anybody who may be offering care to pets, babies, or our home in the rare case that we may be gone for an extended period of time.

DIY Wall Decor!

Michael and I have lived in Germany for 6 months now and we have been staring at blank, boring walls the entire time. It's time for that to change! We've quickly realized that with baby Mikey on the way, now it probably our only change to get our home in order before he arrives. I could not be more on board with this idea, as my inner OCD freak is crying out at the sight of our home! Our first project, DIY Wall Décor.

I've seen wonderful wall decals millions of times that I love, and I've even purchased a few, but living in Germany makes it not only difficult to receive that stuff, it makes waiting on your "stuff" to arrive absolutely miserable, so I decided to create some of my own wall décor.

We recently decided we want to install a breakfast bar instead of putting an actual dining table in the space we have for a "dining room". With the way military housing is set up, it's really just one big square room that they expect you to fit a living room, dining room AND office inside. NOT HAPPENING! So we looked for as many ways to save space as possible, and born was the idea of the breakfast bar. (Full credit to Michael, he was the brains behind THAT operation!)

Since the bar will be up against a wall with no window/view whatsoever, we had to put something there! We haven't decided if we want the bar to face inward toward the wall, or outward toward the living room. It's still a work in progress .... which is why there are no pictures of the bar. Coming soon!

Either way we decide to mount this bar, we need something on this wall. Que the tutorial -

DIY WALL DECOR!
 
First I decided what I wanted to put on the wall. This was probably the simplest step, but it took the most time. There are so many options! Once you decide, I found the images and fonts that I wanted to use on my computer, found average old computer paper and traced my letters STRAIGHT from the computer screen. Easy peesy lemon squeezy!
 
 
Next, I cut out the letters I had chosen. Don't freak if the lines aren't perfect. You will be able to fix this later.
 
 
After cutting out the letters I found the perfect placement for them on the wall. They moved around about 1,873 times before I got it "just right!" Tape those babies up there and make sure you LOVE it before you start painting.


After I taped my templates on the wall, I started taping, again. I taped the outline of each letter and then removed it from the wall. If your lines aren't perfectly straight from cutting out the letters, this is the step that can fix that. Be certain that your painters tape is straight.


I had chosen a 2 level design, so I taped a box beneath my letters as a template for my second level. Because I have done this a few times, I was comfortable enough freehanding this part. I chose a cursive font which would have been impossible to tape, so I just hand-wrote the words on the wall. If you are not comfortable with your ability or do not like your handwriting, find a font you like and practice. And then practice some more, and keep practicing until you are comfortable enough with it. I practiced quite a few times before slapping it up on the wall, here are a few of my trials.
 
 
After everything is taped off, start painting! My favorite part!
 
Let dry. Have patience my friends, it takes time for the paint to try completely and removing the tape prematurely can ruin your design.
 
Do any touching up that may be necessary and viola! Your new wall décor.


Meal-Time Monday! {Broccoli Penne Pasta}

Tuesday

Here is our favorite "clean-eating" recipe of the week!

Broccoli Penne Pasta


INGREDIENTS:
3/4 cup bread crumbs
2 tablespoons butter, melted
1 bunch broccoli, stalks cut off, florets trimmed into 1" pieces
12 ounces penne pasta
2 tablespoons olive oil
1 medium onion, minced
6 medium garlic cloves, finely minced or pressed through a garlic press
1 teaspoon dried thyme
1/4 cup all-purpose flour
2 cups low-sodium chicken broth
1 cup heavy cream
1 teaspoon salt
1/2 teaspoon pepper
1 1/2 pounds boneless, skinless chicken breasts, trimmed and cut into bite-sized pieces
3 ounces smoked mozzarella, shredded
8 ounce jar oil-packed sun dried tomatoes, drained and chopped into pieces
 
DIRECTIONS:
  1. In a small bowl, combine the bread crumbs and butter and set aside. This will be used as your topping. Lightly grease a 9x13" baking dish and set aside.
  2. Preheat oven to 400 degrees and make sure the oven rack is placed in the middle of the oven. In a large pot, bring the water for the pasta to a boil. Stir in one tablespoon salt and the broccoli. The broccoli cooks quickly so stay close! Cook the broccoli for 1 minute, until bright green. Quickly remove the broccoli with a slotted spoon to a plate. Return the water to a boil and add the pasta. Cook until al dente, about 1-2 minutes less than you would normally cook. Drain the pasta in a colander and toss with 1 tablespoon olive oil. Leave it in the colander and set aside.
  3. Wipe the pot dry. Add the remaining 1 tablespoon oil and return to medium heat until shimmering. Add the onion and cook until softened and beginning to brown, about 5 minutes. Stir in the garlic and thyme, cook until fragrant, about 30 second, stirring constantly. Add the flour, alt and pepper, and cook, stirring constantly until golden, about 1 minute. Slowly whisk in the broth and cream, bring to a simmer, whisking often. Add the chicken and cook, stirring occasionally, until cooked through, about 6-7 minutes. Stir in the sun-dried tomatoes and smoked mozzarella.
  4. Add the cooked pasta and broccoli to the sauce, stir to combine. Transfer the pasta mixture to the prepared basking dish and sprinkle

Painted Glass Jars!

Sunday

I have a total obsession with collecting glass jars and doing absolutely nothing with them. They sit in a cabinet waiting for the day they will be transformed into something fabulous and that day never seems to come, until lately!

As I was scanned Pinterest I found a tutorial for how to paint the INSIDE of glass jars. I have seen this before but it never really got me excited until recently. Michael and I are redecorating and I love anything handmade, original, or crafty, so I put my glass jars to good use.


Aren't these fabulous?!
 
 
Here are step-by-step instructions on how to create these jars
 
1. Find glass jars. Any jar will work.
*I used old pickle jars, but mason jars work fabulously as well!*
 
2. Pour in some paint. Be generous with your amount, but don't be wasteful. You only need enough paint to cover the inside of the jar.
 
3. Roll the jars around a bit. The goal here is to coat the entire inside of the jar with a layer of whatever color of paint you have chosen. Make sure to COMPLETELY cover the inside of the jar.
 *I used a sponge to paint around the rim of my jar to prevent bubbles or rough spots.*
 
4. Pour out the excess paint. Be sure to smooth over the rim of your jars again!

5. Let dry. 24 hours is a good amount of time, but depending on the size and shape of your jar, it could take more or less time. Use your best judgment.

6. Accessorize!
*For my jars, rapped in a raspberry colored raffia.*

TA-DA! You've created your very own (very cute!) accessory for your home. Fill with flowers or use for extra storage, whatever works for your home!

THE BUMP

Saturday

If you have been following us for awhile, you remember our weekly board that documented the growth of the baby bump. The board was hi-jacked and we never got out to buy a new one, but the bump has grown quite a bit since the last picture.


SEE WHAT I MEAN?!

At 23 weeks, I have only gained a total of 8lbs, which technically makes me underweight for this stage of pregnancy, but the doctors aren't worried, so I'm not worried!

I measure about 37" around and our bouncing baby boy is growing quicker than ever. Daddy loves to feel him kick at night!

More pictures to come.

Making Progress!

Friday

We are making progress on the nursery! Now that I have returned from my trip with all the new baby purchases in tow, we are finally able to do some real work on the nursery.

We started by simply painting his name on the wall, which I did free-hand, and let me tell you, it wasn't easy! We have more details to add, but here is what we have so far ...


We still have plans to add some airplanes and trucks on the wall, but we're taking baby steps!


We have also put the bedding on, it looks great! We also finished the wall, which I'm kind of obsessed with.

We have been doing some other crafts to give our new addition an original nursery, so I got to cleaning out a pickle jar and painted it to store pacifiers and we found some fabulous plastic bins to store swaddles and clothes.


Things that we still need to do -

1. Sort through all the "stuff" - this room was previously a storage room, so we need to clear out the junk and make room for our newest addition! We've made some progress, but there are still things to be done.

2. Find room for all the clothes! This boy has more clothes than Mom & Dad combined, so we are clearing out closets and finding storage solutions to make room for all the fun baby outfits.

3. Accessorize! As surprising as this way, this is Michael's favorite part. He loves adding small details and decorations to the room to make it warm and welcoming for the arrival of our son!

The list is much longer, believe me! I'm coming up on my 3rd trimester so we are looking forward to finishing up the room soon!

Happy 2013!

Tuesday

Today is the first day of 2013, and like many of you, we are making our New Year's Resolutions.

Our Resolutions for Our Family
  1. Eat better - I'm sure 1 million other people have made the exact same resolution, but Michael and I are bringing a baby into the world and we both agree that we do not want him to pick up on our eating habits, so we have chosen to set a good example!
  2. Be More Thankful! - When we moved to Germany, we had a really hard time adjusting to the change and we were so miserable in the beginning, but we have slowly come around in 2012, and we have vowed to be thankful for the opportunities that we have been given instead of focusing on the things that we do not have.
  3. Create a budget AND stick to it! - Michael and I have always had a budget, since we have been married, but we have always struggled sticking to it, but this year we are motivated to stick to our budget and set healthy financial examples for our son.
  4. Focus on our marriage - Michael and I recently celebrated our 1 year wedding anniversary, and with all the things that go on in our lives it can be difficult to spend some quality time together, so this year we would like to designate 1 day a week to "date night" (and actually go on a date!)